
How to Organize a TOTAL MESS!
- by Barb Shelton
- May 10, 2016
- 11 min read
"This system has changed how my whole family deals with with clutter and organizing! Life-changing for me." ~ Laine
"This is so helpful. I have used this method so many times since you shared it with me!" ~ Berdie
"This is so great for my kids because THEY can utilize it too!!!!" ~ Maggie
"I still do this!! You taught me well.😍" ~ Amy
These gals are referring to the easy, FREE system ~ using stuff you already have on hand* ~ that I created and use for organizing and sorting BIG messes!
* assuming you have brown paper sacks,
blank paper, and paper clips on hand.
Here's what it looks like in action, just to give you a peek!

WHAT KINDS
OF MESSES?
Any kind where you have lots of STUFF that you have NO idea where to start dealing with it, let alone organizing it. Like:
a cram-packed mess of a closet
an area of a room that you can't find anything in
an entire room that you can't even walk in
a stuffed-to-the-gills garage
a corner of the basement that has been the catch-all for everything that you haven't been able to find a place for in the house...
...or just any place you have stuff piled up that you don't know what to do with, or that just overwhelms you, and therefore it has been on your "Avoid-At-All-Costs List" for while now.
My system takes just a few minutes to set up and is very convenient to use. Everything it's comprised of can probably be found right in your home.

Since it's currently an "11-Sack System," it consists of 11 sheets of paper, the ink to print the words onto said paper, and 22 paper clips!
Under 50 cents! ... FREE, really!!!
These sacks, standing at attention in the middle of your mess, will actually help you stay on track and keep your attention focused on the chaos at hand ~ and feet!
(Sign up HERE to get the latest updates from me!
Then click your BACK button to come right back!)
HOW IT WORKS
You get your 11 sacks set up with their labels, and line up all your labeled sacks in one part of the room you're organizing ~ on a floor or a table or a bed, and then start tossing stuff into the bags.
That's the basic idea. So for you independent people who want to take the idea and run with it, you're excused now. Like, to go ahead and exit. (to another article) Buh-bye!
But I know there are those who want more detail on the how-to's of this, like I myself would. So stay with me... there's lots more to come that will make it very easy to do this!
By its very nature, this system helps you make decisions, which, for me, is the biggest problem.
And it keeps me from feeling overwhelmed ~ which rises up in me when I don't know what to do or lack direction.
A sack can give you direction? Yep! That's exactly what these sacks do! Right in the middle of the biggest TOTAL MESS you can find!
A GROWING SYSTEM
This system actually started out in life as a wee little 5-Sack System, but when I presented this in my organizing seminar, people often suggested additional ideas that I had to add on!
Plus when I use this system at home, a new mess sometimes inspires a new category to add on.
So here is my set of sacks back when it was still growing up and was just an adolescent 9-Sack System. It's all dressed up and ready to be put to work!

When I first began doing this ~ long before the days of computers ~ I just wrote the titles directly onto the sacks with a Sharpie pen.
But it was hard to read writing done with a Sharpie over the print on a sack and on the darker brownish-beige color of a sack. (Imagine any of the sacks above with just black writing on them.)
So I eventually created labels on my computer that I could print out onto white paper and attach to the sacks.
The long 11-inch edge of the paper is actually just under the width of the sack, so the labels fit on very nicely!
ABOUT THE
SACK LABELS
If you enjoy creating labels yourself, go for it! You can do them on your computer or by hand with a Sharpie pen.
But, if you'd like to have the work already done for you, I have a FREE PRINTABLE with all of these labels ready to print out ~ so you don't have to create them from scratch!
(Note: The categories in the printable are a bit different from what you see in the pictures herein. I edit and improve documents every time I access them, so yours is a little better!)
And please remember that the grey dotted line above each word is a FOLD line; not a line to cut on! (Can you tell from the urgency in my voice whether or not I have ever cut on a fold line myself?)
THE COLOR SYSTEM
I used to print the labels in black ink (which all the photos show), but I have since created the labels in color because my eye gets "trained" to connect with the various titles by their color. So I don't have to stop and read the labels as I'm working on my mess
I associate the green letters of SELL with green money.
The black GARBAGE letters are the color of a big black garbage bag.
The blue letters of GOODWILL remind me of Goodwill's blue logos.
The three pink titles are of a GIVE AWAY nature, reflecting my loving heart to bless someone. (Corny, I know, but whatever works, right?)
RETURN is in brown ~ like the brown box or brown sack that I'll put the return items in when I deliver them to people.
Then the three ORANGE-colored labels go somewhere in my house. Orange is for warm and sunny, which I try to make it inside my house even if it's raining outside!
And DECIDE is in purple, which I associate with royalty, as purple was a color that only royalty could afford in ancient days. And, as royalty, I am making (important) decisions about what to do with stuff.

If you don't have a color printer, you could hand-write the titles in colored Sharpie pens, felt pens, or crayons.
But if you don't want to go to that much work and you only have a black ink printer, it works just fine to print this in black. (Printing in B&W, the words will appear in varying shades of black and grey since they started out in colors.)
Or, if you like the idea of using color, you could even just underline or circle the words in different colors.
And now... here is the link to the FREE PRINTABLE document ~ with all my full-color labels ~ for you:
in Word - editable
SUPPLIES:
11 brown paper sacks
22 paper clips (any size)
11 labels
SETTING UP
YOUR SACKS
1) PRINT all the labels in the printable onto regular white paper.
2) FOLD the label pages along the dotted line. (Do NOT ~ I repeat NOT ~ cut on that dotted line! You need that fold to go down over the top of the sack.)
3) Carefully* fold the top edge of each sack down about 1.5 inches so that they will stand up and stay open. (No need to measure! The sack just seems to naturally want to fold at a certain spot.) This will enable you to toss things into them from a few feet away. (Be sure to give yourself points for getting particularly good shots!)

*The reason I say to carefully fold the edges down and over is to keep them from tearing, cuz once they tear, you lose the firmness around the top. If that happens, just tape the rip. But that takes more time, so it's quicker to be careful.
4) ATTACH the label to the sack with two paper clips ~ one on each side ~ to keep it secure, which will also help keep the sack more sturdy and make it stand up very nicely.

Here's the sack all set up, standing at attention, and ready to receive whatever might get tossed its way!
See how easily readable this size font is from even across the room ~ as in the picture below?!?
5) SET UP YOUR SACKS IN THE ROOM YOU'LL BE ORGANIZING. One way to do this is to arrange them in two rows. Here's how I arranged mine when I cleaned out our storage room.
The reason you can see the labels of the sacks in the second row so well is because I set that back row up onto some boxes. I need to be able to see the labels easily.
If you want to keep moving quickly and not get frustrated, you need to be able to see all of the sacks the whole time you're working!
You can also line up the sacks side-by-side in a single row around a room, but I didn't have room for that here (waaaay too much STUFF in my little storage room!), thus the need for the double-row approach!
POP QUIZ!!!
The dotted lines are:
a) to cut along
b) to fold on
c) beelines
(Answer at
end of post.)
HOW TO ACTUALLY
GET GOING
You're in your messy room, you have your sacks all set up... So how and where do you start?!? Here's my simple 3-step system:
1) Take a deep breath and pick up one item ~ any item ~ in The Mess.
2) Look thoughtfully and closely at the item... look over at your titles on the sacks... and figure out which of the sacks it should go in... once you decide, PUT it there! (Yaaaay! One decision made; one item less to deal with!)
3) Now pick up the next item, and REPEAT! ... You're on your way!!! And as you go and find out how easy this is, your momentum will pick up!
CLINIC
I have helped many people with the above process ~ as in, in person, like with Jessica here...

...and I wish I could do it with everyone, but the next best thing will be to give you several examples of what I'd do with various items:
Item: a MUG that your cousin has told you she loves and would like to have, but you weren't ready to give it up at the time. Now you are. Put it in the GIVE AWAY TO A SPECIFIC PERSON / PLACE sack. You can go through that sack later and either put items into bags with names on them, or put post-it-notes on them with the names.
ITEM: a nice serving tray that you no longer need, that no one you know would like, and that you could probably get some money for on Craig's List. Put it in the SELL sack.
ITEM: a sweater that's in good shape, but you don't want to see it on anyone you know. Put it in the GOODWILL sack.
ITEM: a book that a friend loaned you 5 years ago. Put it in the RETURN sack. These items go to specific people. Later on attach post-it-notes with the names of the returnees to each of these items. If more than one item goes to one person, put them in a sack (or rubberband them) so they stay together and you don't accidentally return just one of the items to them, only to find another when you get home. (The RETURN sack can just be placed in the car!)
ITEM: a tote bag that you no longer need because someone just gave you one for your birthday, but you aren't sure who might like it, other than you're sure someone you know would like it. So you don't want to give it to Goodwill. Put it in your GIVE AWAY TO ANYONE sack. This is the bag that friends and family get to go through to find any treasures they'd like to have!
ITEM: a receipt from Burger King. Toss it into the GARBAGE sack. You will probably need to empty this sack a few (many if you're like me) times during the process. So have a large black plastic bag in a room nearby that you can empty this sack into.
ITEM: a back scratcher that you got as a gift, your first one ever (I love these!), but you don't have a place for it. Put it in the MAKE A NEW PLACE FOR sack.
ITEM: a magazine that you are done with. Put them in the TAKE TO THE LIBRARY sack ~ assuming you have a library that has a magazine exchange service.
TIPS TO MAKE
IT EASIER
Some sacks will fill up faster than others, it'll depend on the specific stuff you're dealing with. It doesn't matter; this isn't a contest! Just keep taking items to wherever you need to take them ~ be it a pile of items on a bed that you'll be finding new spots for, places in the house that those items already have a spot for, your garbage cans (or in our case, the truck, with several loads to take to the dump!), or to your car trunk containing things you'll be giving away or returning.
So let me clarify: you want to keep your row of sacks right IN the room/area you are organizing. Let's say you have filled up the Goodwill sack and know you'll have lots more. You'll want to transfer its contents into a large black plastic bag, or a box... or anything that you will actually take out to your vehicle and deliver to Goodwill in.
Just be sure to not get sidetracked "wherever" you go; but get right back to the room you're working on! (Not that I've ever done that! But I've heard it can happen!)
Quickly label the overflow bags, or even boxes, that you're taking out of your main work area so that you can keep the labeled ones where you're working.
By the way, our local library has a "give 'n' take" table where people can bring their magazines as well as take whatever magazines they want. One must just be careful to not bring back home more to sort than one took there to get rid of!
Of course, there will be some items that are too breakable or too heavy that you can't just toss; simply walk that item over to the sack and carefully set it.
FINISHING UP!
Once you've gone through and sorted everything ~ and oooooh will it ever feel wonderful ~ you will want to get all your deliver-somewhere stuff in sacks or boxes, ready to deliver to the various places!
Your "PUT AWAY IN HOUSE" sacks may be something you'll want to save for another day. I call this the "2nd level" of organizing.
Level 1 is using the sack system to sort and clean a room; Level 2 is doing something with the sacks that came out of that first sorting. Level 3 would be fine-tuning a drawer or bin or box from Level 2.
Don't worry one bit about what level you're in; that concept just helps me stay focused and get the job done that I need to stay in. If I want to stay in "Level 1" and get that job done, I can't get distracted on Level 2 or 3 tasks! (which, by the way, will sound very appealing if you're not particularly enjoying the big job!)
SAVING THE SACKS
FOR ANOTHER TIME
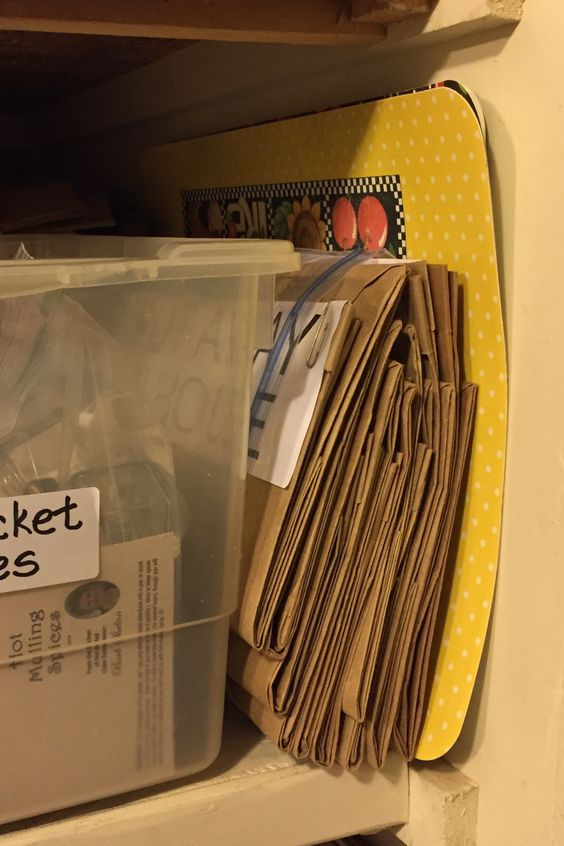
I personally prefer to keep all the prepared sacks with the labels for future organizing sessions so that I don't have to print and prepare all the sacks each time! Plus, having them ready to go is one less reason to not start the task.
Here's the whole stack of them enjoying a well-earned rest on my table after a day of hard work:

It doesn't take that long to make them, but why do it again if you have space to store them? Folded up, they take very little space, especially when put into a one-gallon zip-lock bag ~ which will also keep them together.

Then just stash this bag beside another box or bin in a storage area!
I'd love to hear
your organizing success
stories, and to also see
"beefore and after"
pictures of your
projects!!!
(Sign up HERE to get the
latest updates from me!!)
POP QUIZ ANSWER KEY:
¡uo pןoɟ oʇ (q
(I got the reverse-text
generator HERE!!!)


Comments